Layout editing is another role that can be configured in different ways. A journal may have the section editor or copyeditor do the layout editing, or assign a separate layout editor. The journal must be configured by the Journal Manager in Step 4: Managing the Journal to accommodate a separate Layout Editor.
This is custom heading element
Layout editing consists of taking the final copyedited submission file from OJS and using external software (e.g., Adobe Acrobat or Dreamweaver) to create the HTML or PDF files, known as galleys, which will be published on the web site. This is a critical step, as it uploads the files that will be viewed by the journal’s readers.
If you as the Section Editor doing the layout editing, follow these steps:
First, download the final copyedited version of the submission which has automatically moved to the Layout section:

Next, using the downloaded submission file as your source document, convert it into an HTML or PDF version suitable for online viewing.
For HTML files, you might want to use software such as Adobe Dreamweaver or the open source Nvu. Exercise caution if using Microsoft Word to generate the HTML, as it will introduce non-standard tags which may disrupt the display of the submission when published on your web site (Note: Dreamweaver has a “Clean Up Word HTML” option that can help with this).
For PDF files, Adobe Acrobat can easily convert Word documents, as can Microsoft Word 2007. The open source Open Office suite can also open Word documents and easily convert them into PDF files. Many journals on a limited budget have opted to only display PDFs, as it takes significantly less time to create PDF files, and requires less technical knowledge.
Returning to OJS, you will next need to upload your HTML or PDF file as a “galley”:
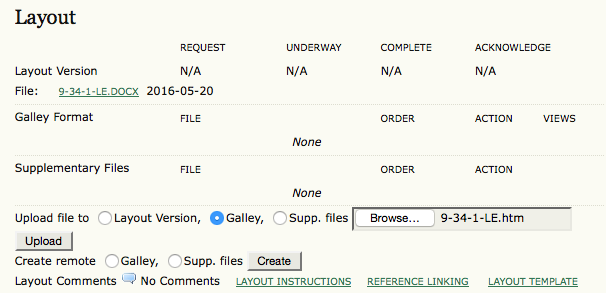
If it is an HTML file, the following screen will appear:

OJS will automatically include a “label” (eg. “HTML”), which will become the link text on the Table of Contents.
If you upload an HTML file, you can also optionally upload a separate stylesheet for the file and images or other media associated with the article.
If it is a PDF file, this screen will appear:
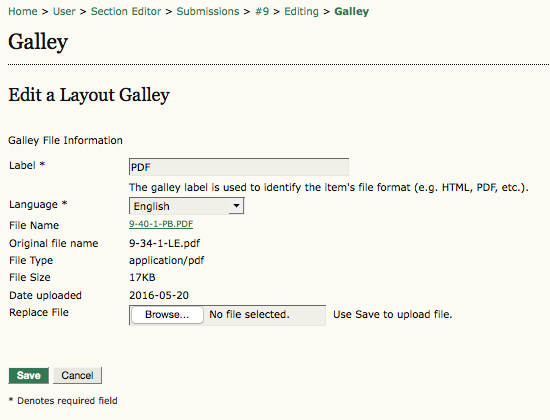
OJS will automatically include a “label” (PDF), which will be the link text on the Table of Contents.
Returning to the Layout section, you will now see your galleys.
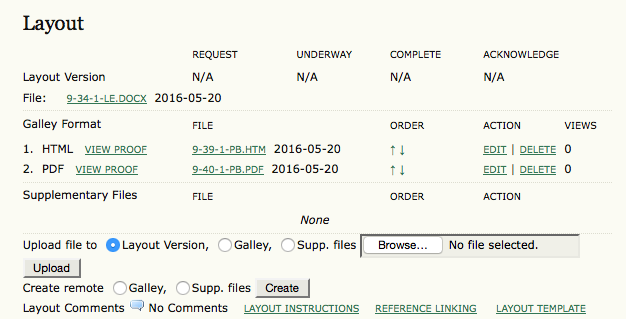
View Proof will display the galley in your browser.
The linked file name will allow you to download a copy of the file.
The Order arrows will allow you to change the order of the galley links on the Table of Contents. In this example, the HTML link would appear before the PDF link. These Order arrows would allow you to adjust that.
The Edit link will take you back to the “Edit a Layout Galley” screen, allowing you to replace the galley file (without modifying that galley’s view count) or, in the case of an HTML galley, add a new stylesheet or images. Using the Delete link will remove the file (and all viewing statistics — see the Views column).
The Views number (0 in this example as it has not yet been published) is an important statistic that records the number of times readers have downloaded a copy of the galley file. If you delete the file, these views will be reset to zero. If you edit the file, these numbers will be maintained.
Finally, you may wish to upload additional supplementary files for the article, such as Powerpoint slides or an Excel spreadsheet of data. You can do this by changing the “Upload File to” button from Galley to Supp. Files and using the upload tool. These files will be visible in the Reading Tools for the article.
The Separate Layout Editor Process
Once the Copyeditor completes the final Copyediting step, you have a “clean” version of the submission, which automatically moves to the Layout stage.
As the Section Editor, on receiving notification of the completion of the copyediting, return to the submission record to select a Layout Editor.
The record has been highlighted to indicate an action is required in the layout editing stage.
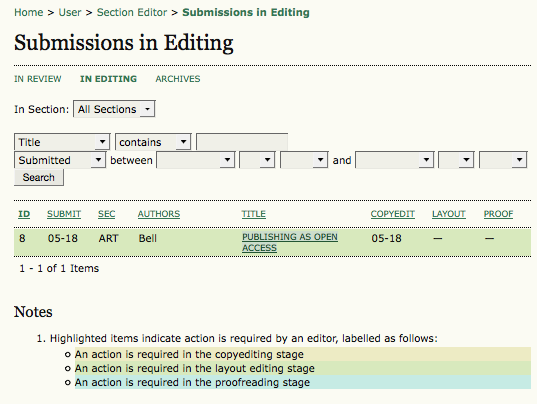
Select the submission record, scroll to the Layout area on the page, and click on Assign Layout Editor.
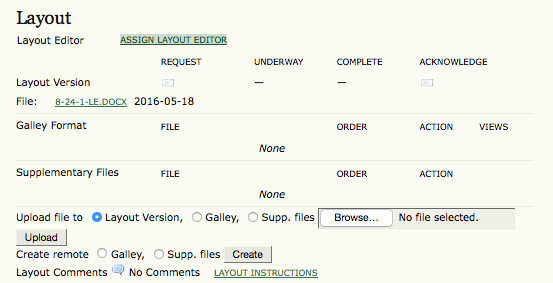
The resulting page displays individuals assigned to the role of copyeditor. Select one by clicking Assign.

Request that the Layout Editor begin work by using the email icon under Request to generate an email message from a template.
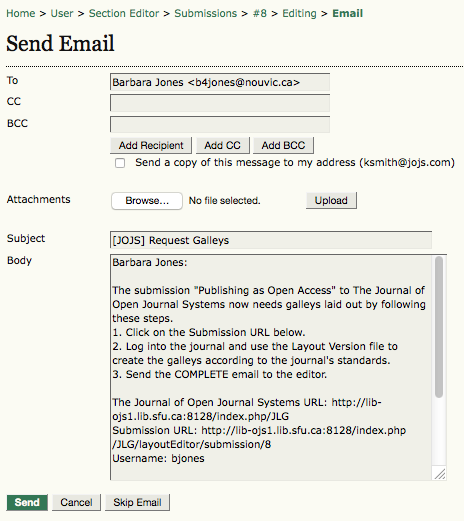
The Layout Editor will prepare galleys for the submission in each of the journal’s publishing formats (e.g., HTML, PDF, PS, etc.). The Supplementary Files, which remain in the original file format in which they were submitted, will be reviewed by the Layout Editor and Proofreader to ensure that basic formatting is in place, and that the files conform as well as possible to journal standards. You will receive an email when the Layout Editor has completed the initial production of the galleys.
See Chapter 11 Layout Editors for more on this role.
Upon receiving the email notification, log back into the system and return to the submission record. You will see the galleys in place. Use the Acknowledge email icon to thank the Layout Editor for his work.
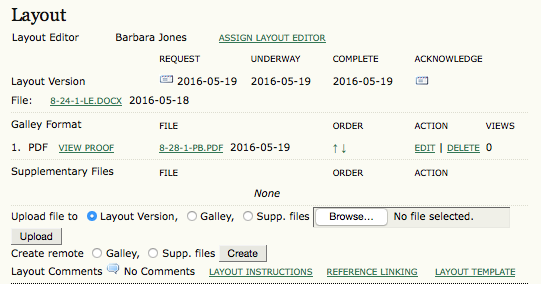
As above, when the Section Editor performs Layout duties, you can:
- select the View Proof links to quickly view the galley files.
- click on the linked File names to download a copy of the galley file.
- use the Order arrows to determine which galley appears first on the Table of Contents.
- use the Edit link to revise the galley files.
- use the Delete link to remove the galley files.
- note the numbers in the Views column.


