Production
With the completion of the Copyediting stage, the submission now moves to Production. From here, the copyedit files (often Microsoft Word files) will be converted to publishable formats (e.g., PDF, HTML) and proofread before publishing.
To start working in Production, the Section Editor must login to the system and choose the submission from his dashboard.

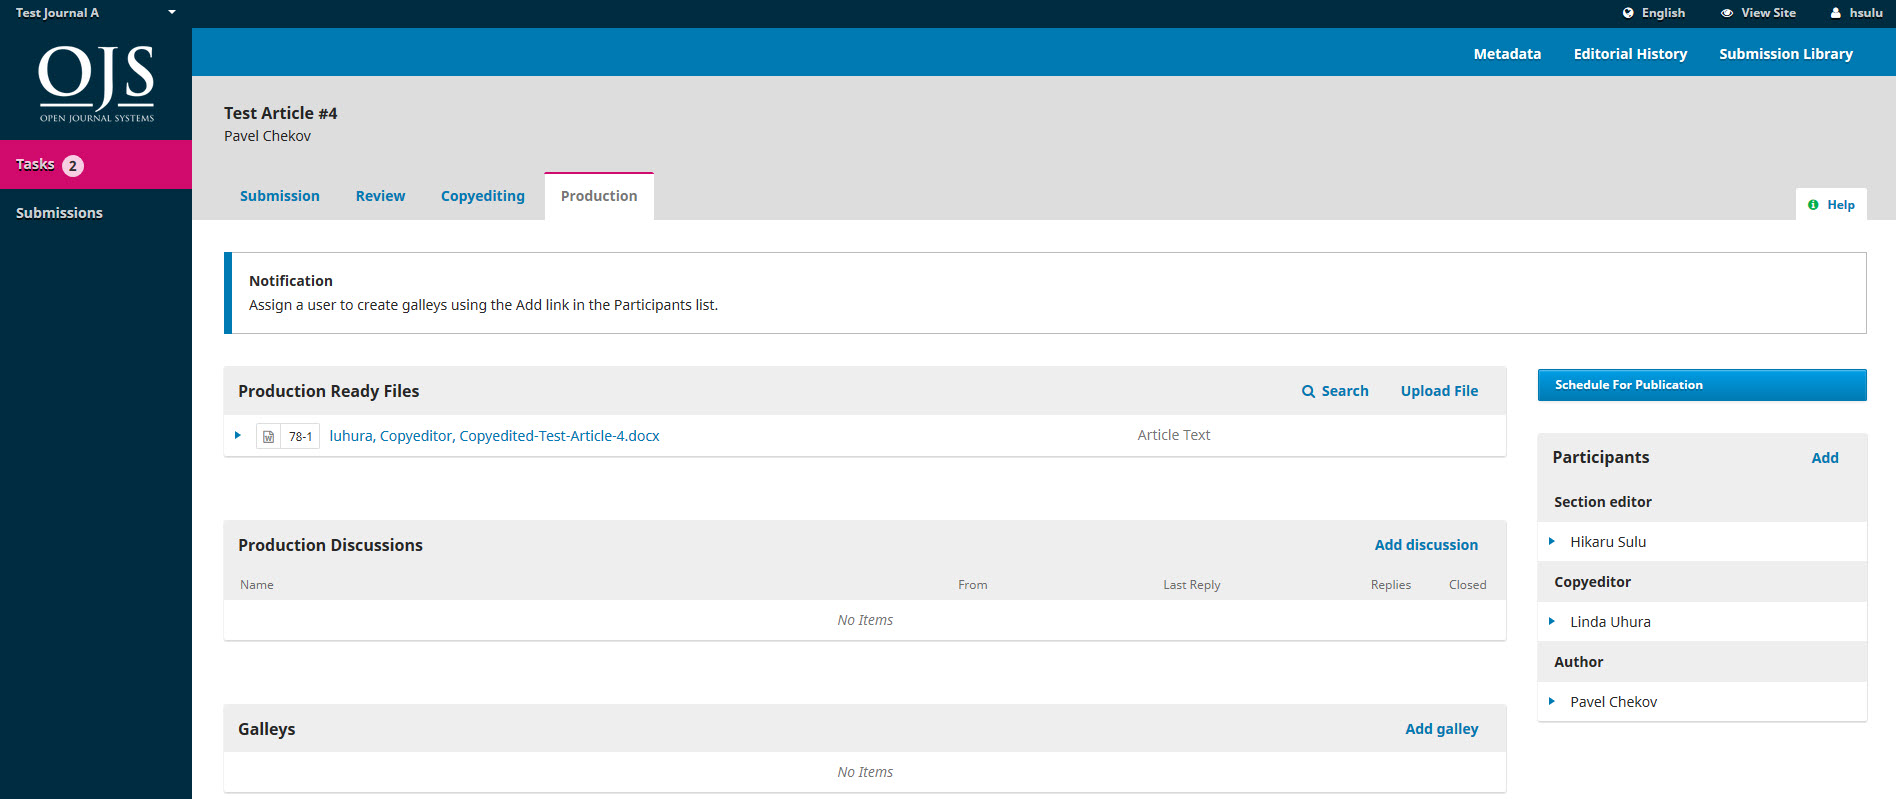
Choosing the Production link will open the submission record.

You will see the copyedited files are now available in the Production Ready Files panel.
A notification banner also indicates that you must assign someone to create the galley files (e.g., the PDFs, HTML, etc.) from those production ready files.
This can vary from journal to journal — you may have layout editors or production assistants to do this work.
To make the assignment, use the Add link in the Participants list. This will open a new window.

Use the role selector and search button to find appropriate users, select one, choose a predefined message, and hit OK to send.
The user has now been notified via email and in his dashboard.

Notice that the notification now indicates the submission is “Awaiting Galleys”. You can see the layout editor in the Participants list, and you can see the request notice in the Production Discussions panel.
You can now wait for the Layout Editor to complete his tasks.
Layout Editing
As the Layout Editor, you will have received a message inviting you to create the galleys for the submission.
To get started, login to the system and go to your dashboard.

From here, find the submission and select the Production link.
This will take you to the submission record.

From the Production Ready Files panel, download the files to your desktop and work outside of OJS to convert them to the formats appropriate for your journal (e.g., HTML, PDF, etc.).
Note: PKP is currently working on a project to automate the conversion of Microsoft Word documents into other formats, including XML, HTML, PDF, EPUB, etc. Keep an eye on our blog for updates.
Contact the Author
Next, you will want to share the PDF with the author for a final look and sign-off.
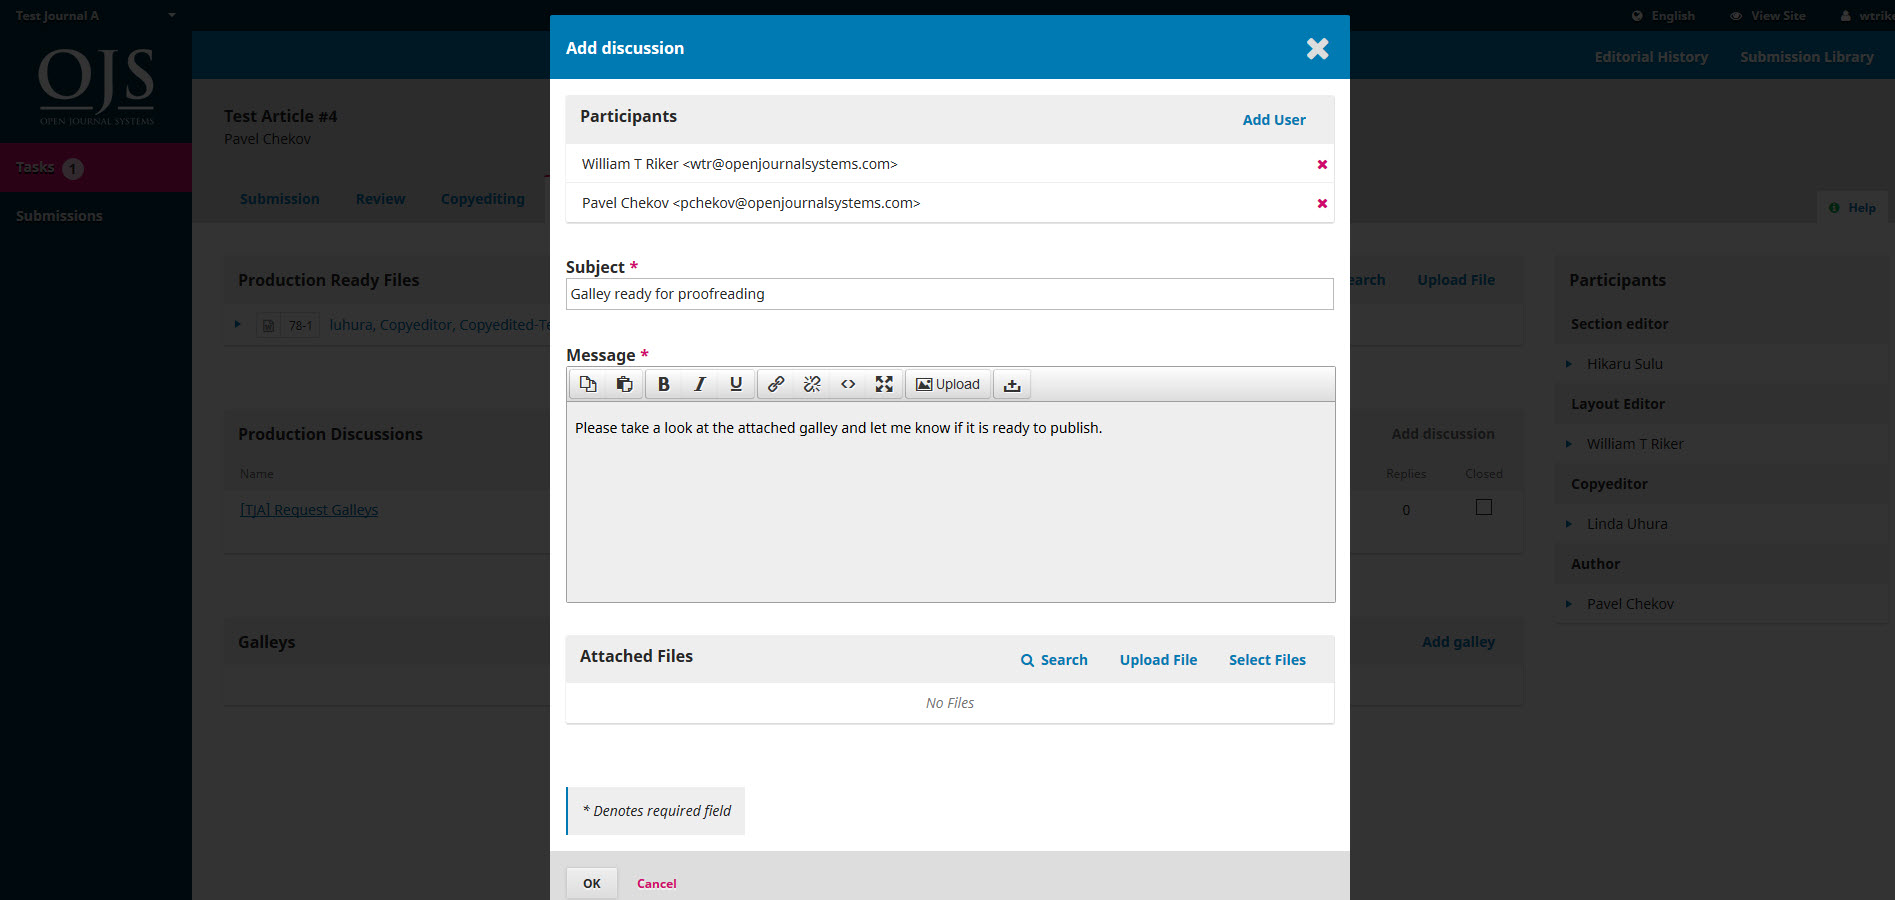
To do so, use the Add Discussion link in the Production Discussion panel. This will open a new window.

Remember to add the author at the top of the window, and then add a subject and a message.
Before sending, however, attach a copy of the PDF file using the Upload File link. This will make it available to the author.

Remember to select the correct Article Component, and then upload the PDF.
Hit Continue.
Next, make any changes to the file name (usually you don’t need to do anything here).

And then, you can upload additional files, if necessary.

Once you are done, hit Complete.
The file is now attached and you can send the message using the OK button.

The Author has now been notified and you can await his response.
Author Response
Once the author has had a chance to review the galleys and respond, you will receive an email notification and will see a reply in the Production Discussions.

Add Galleys
Now that the Author has proofread the galleys, you can make any final changes, an then upload them to the Galleys panel.

To do so, use the Add Galley link, which will open a new window.

Add an appropriate label (e.g., PDF, HTML, etc.) and Hit Save.

From this window, choose the appropriate article component (e.g., article text) and upload the galley file. Hit Continue.

If necessary, change the filename. Hit Continue.

If you have more files, upload them now. Otherwise hit Complete.
You can now see the galleys in the Galley panel.

You can make changes to the upload by selecting the blue arrow to the left of the galley label, which reveals options to edit, change the file, or delete.
Inform the Section Editor
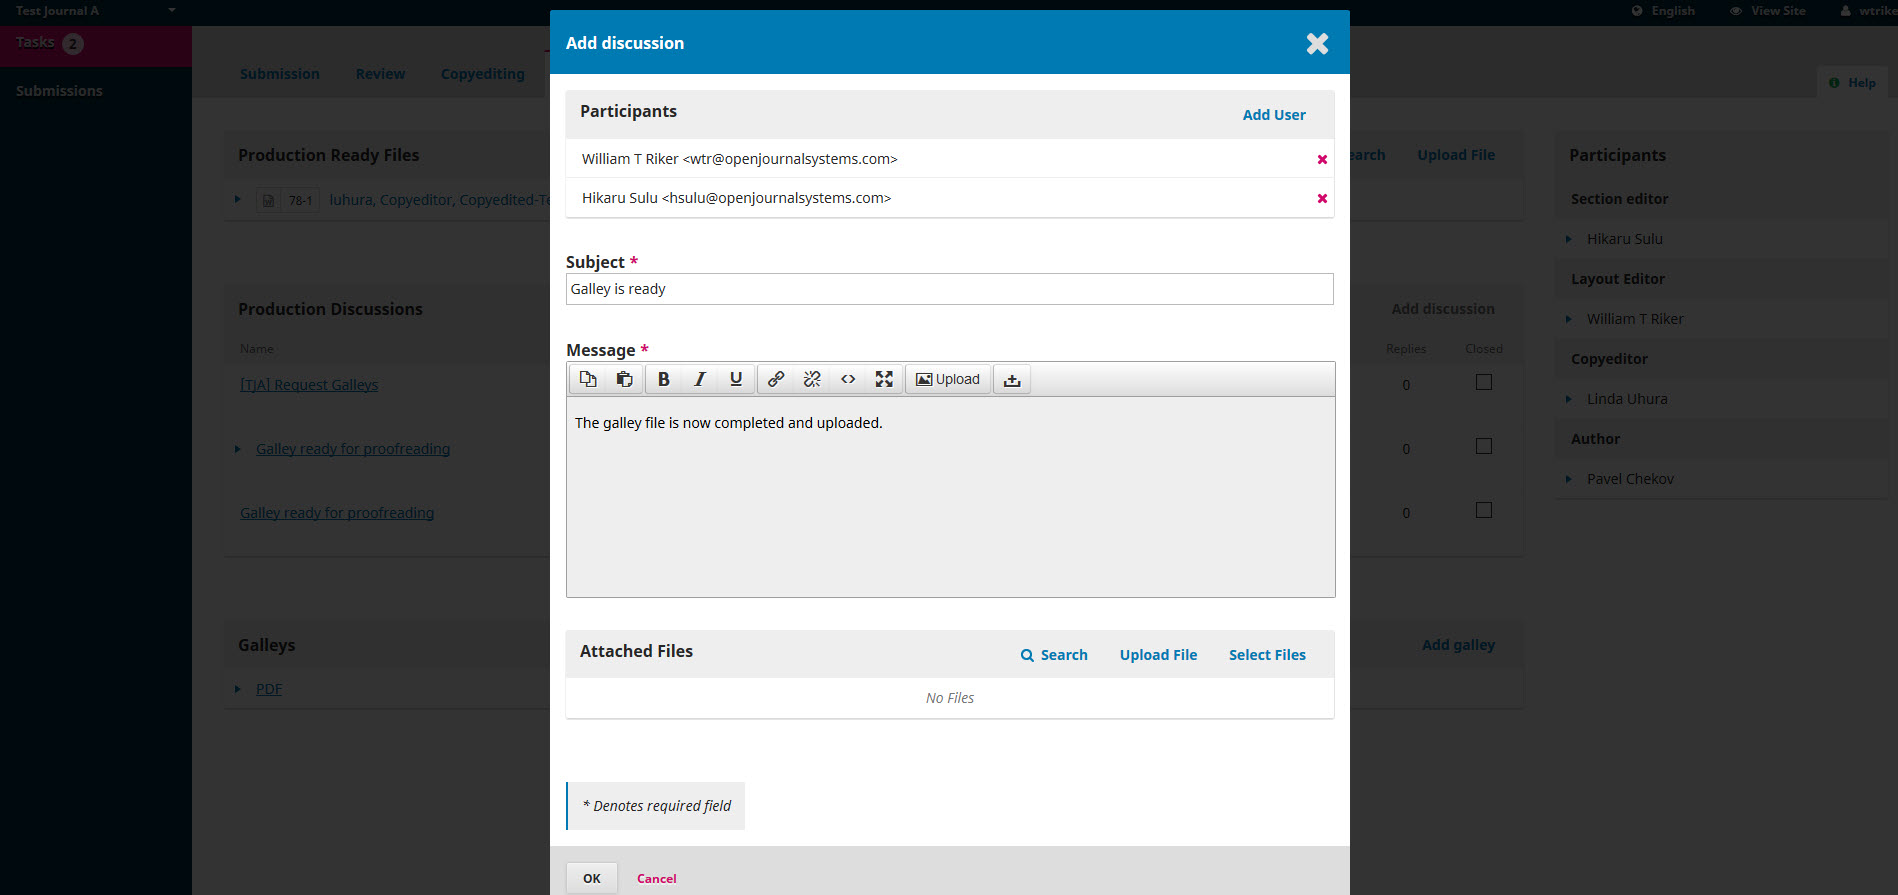
Finally, you will need to inform the Section Editor that the galleys have been completed. To do so, use the Production Discussion panel and choose the Add Discussion link.

Add the Section Editor to the top of the page, and then include a subject line and message. Hit OK to send the message.
You can now see the final discussion.

Section Editor Informs Editor
At this point, the Section Editor receives the notification from the Layout Editor and reviews the galley files.
She can either ask the Layout Editor to make additional changes (using the Production Discussions) or inform the Editor that the galleys are ready for publication.
To inform the Editor, use the Production Discussion panel’s Add Discussion link.
Scheduling for Publication
Upon receiving notification of the completed galleys, the editor logs into the submission record, and checks the uploaded galley files.
If the galleys look ready, the editor can hit the blue Schedule for Publication action button.

Selecting this button opens a Publication window.

Use this to add the submission to a future or back issue of the journal.
You also have the option to add page numbers, permission, and licensing information.
Hitting Save will publish the submission to the selected issue. If the issue is already published, the submission will be immediately available to readers.
Congratulations! You have now come to the end of the editorial workflow.


